Running system on armv7m4-stm32l4x6-nucleo (ST STM32L4x)
This version is designated for STM32L4x6 processors with Cortex-M4 core. To launch this version the final flash image
should be provided. The image is created as the final artifact of the phoenix-rtos-project building and is located in
the _boot directory. The image consists of a kernel, TTY UART driver, RAM disk filesystem, and psh (shell).
See how to build the Phoenix-RTOS system image.
Development board
The easiest way to start programming hardware targets using Phoenix-RTOS is to get some of the evaluation boards with a specified target processor or microcontroller.
In this case NUCLEO-L4A6ZG is the example of a
board with stm32l4x6 microcontroller.
Connecting the board
To provide a power supply for the board and make flashing possible, you have to connect a USB to micro USB cable between
your host pc and the development board (USB PWR port, also called CN1).
To communicate with the board you will need to use a UART-USB converter, like PL2303 TA.
- Connect TX, RX, and GND wires to the USART2 (called also USART_B) in the Nucleo board. For example, using PL2303 TA:
- PL2303 TX (green) - Nucleo USART_B_RX
- PL2303 RX (white) - Nucleo USART_B_TX
- PL2303 GND (black) - Nucleo GND
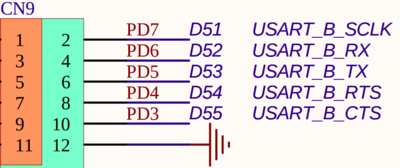
Source: The Nucleo board's schematic, available on https://www.st.com/en/evaluation-tools/nucleo-l4a6zg.html#cad-resources
- Put the converter into your host PC's USB port
The picture below presents how the board should be connected:

-
Now you should verify, what USB device on your host-pc is connected with the
UART(console). To check that run: -
On Ubuntu:
bash
    ls -l /dev/serial/by-id
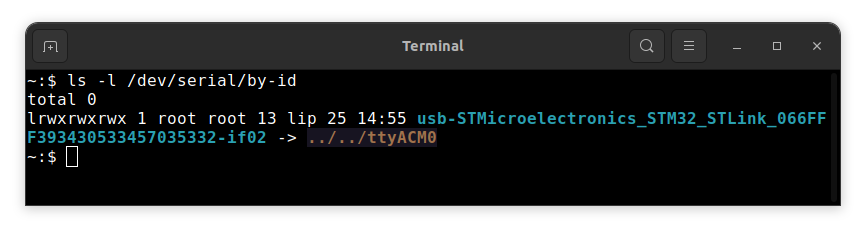
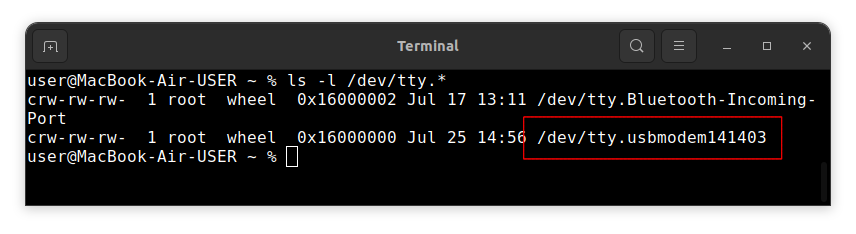
- On macOS:
bash
  ls -l /dev/tty.*
- Open serial port in terminal using picocom
bash
  picocom -b 115200 --imap lfcrlf /dev/tty[port]
How to get picocom and run it without privileges (Ubuntu 22.04)
bash
  sudo apt-get update && \
  sudo apt-get install picocom
To use picocom without sudo privileges run this command and then restart:
bash
  sudo usermod -a -G tty <yourname>
How to get picocom (macOS)
bash
  brew update &&\
  brew install picocom
You can leave the terminal with the serial port open, and follow the next steps.
Flashing the Phoenix-RTOS system image
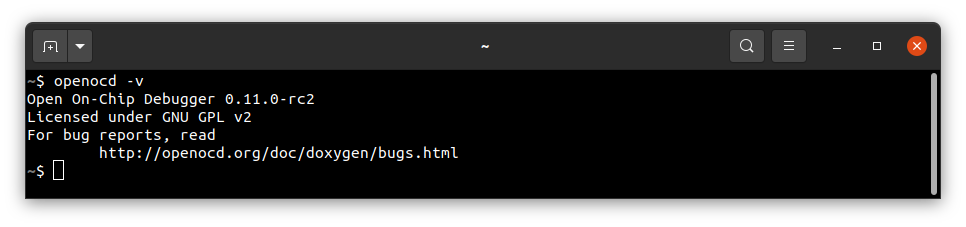
To flash the image to the board you will need openocd in version 0.11 or 0.12. You can check it using
openocd -v
How to get openocd in version 0.11 (Ubuntu 22.04)
To install from the default repositoriy:
- use
apt-get
bash
  sudo apt-get install openocd
- check if the version is correct
bash
  openocd -v
To install manually:
- download
openocd-0.11.0-rc2from here - enter the downloaded directory
bash
  cd openocd-0.11.0-rc2
- install openocd
bash
  sudo apt-get install libusb-1.0 && ./configure --enable-stlink && make && sudo make install
- check if the version is correct
bash
  openocd -v
How to get openocd (macOS)
-
install openocd
bash brew update &&\ brew install open-ocd -
check if the version is correct
bash
openocd -v
If you have openocd, next you can use the following script:
sudo phoenix-rtos-build/scripts/program-stm32l4x6.sh _boot/armv7m4-stm32l4x6-nucleo/phoenix.disk
or use openocd directly:
openocd -f interface/stlink.cfg \
-f target/stm32l4x.cfg -c "reset_config srst_only srst_nogate connect_assert_srst" \
-c "program _boot/armv7m4-stm32l4x6-nucleo/phoenix.disk 0x08000000 verify reset exit"
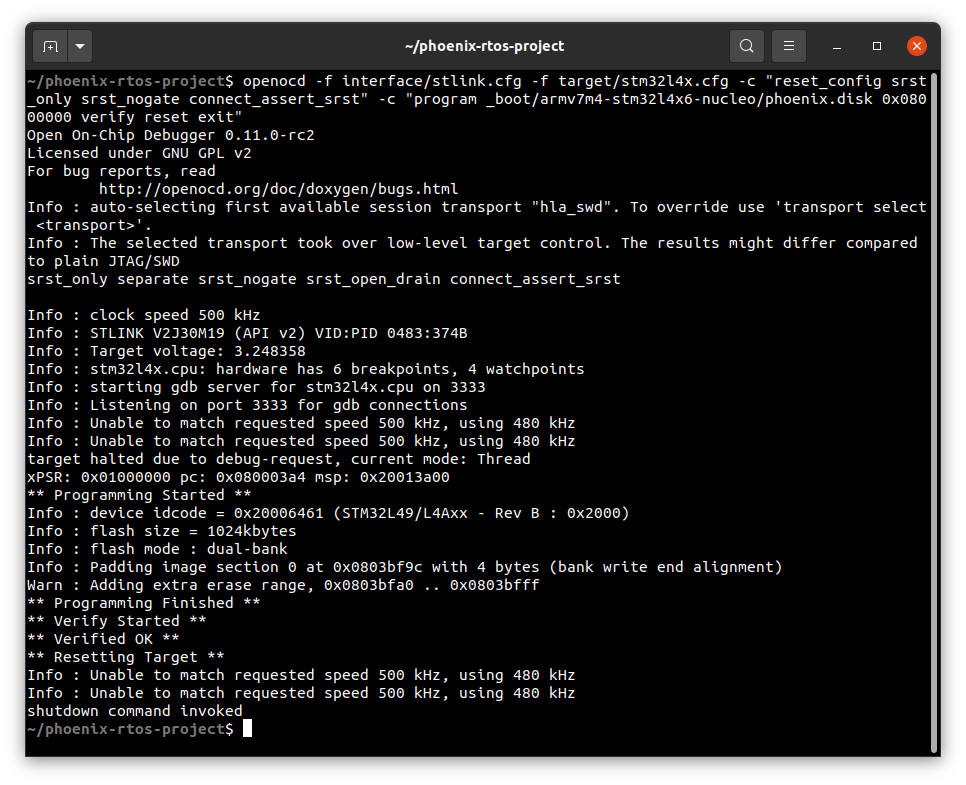
The script can be modified to accommodate other SWD interfaces.
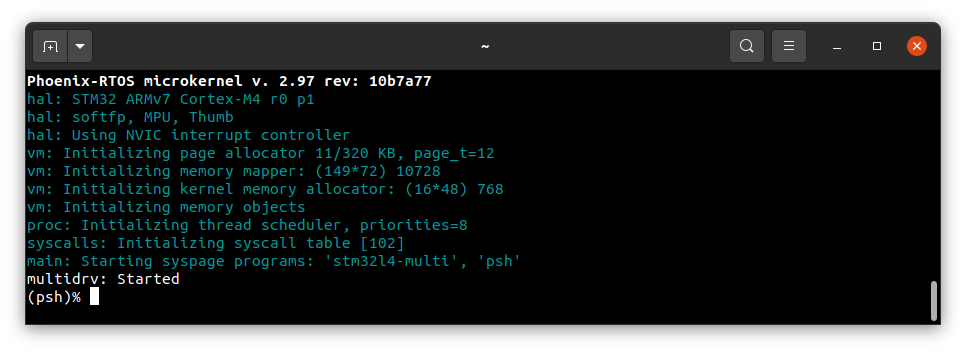
Using Phoenix-RTOS
Phoenix-RTOS will be launched and the psh shell command prompt will appear in the terminal with the serial port
opened.
- Note: You can also enter plo (Phoenix-RTOS loader) by pressing any button, for example,
enterwithin some time after reset (usingRESET B2).
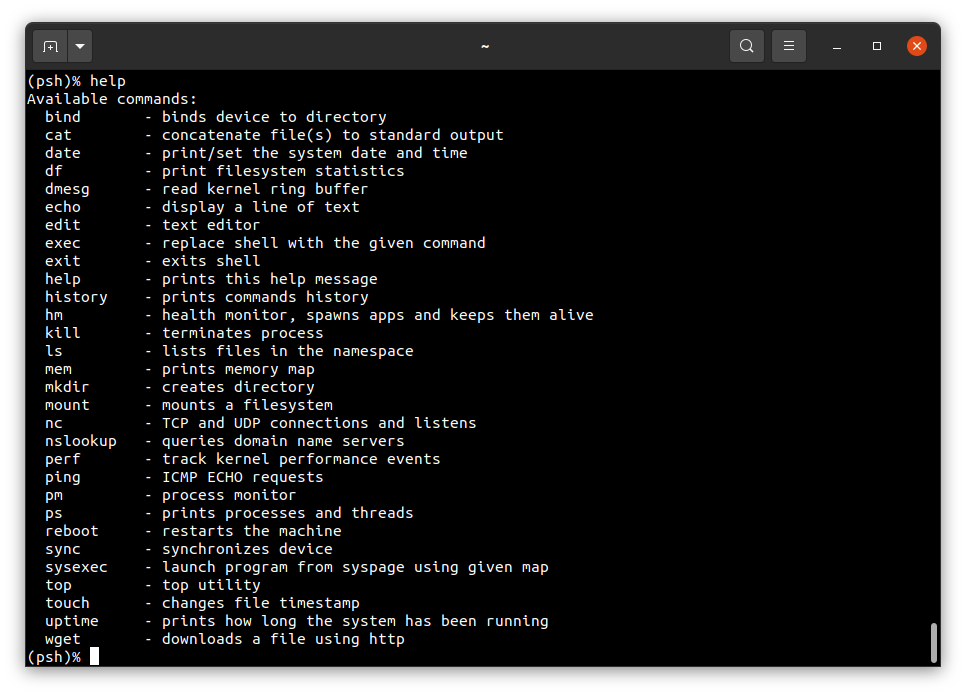
To get the available command list please type:
help
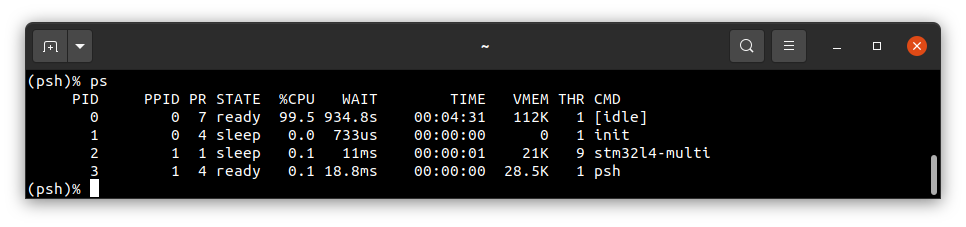
To get the list of working processes please type:
ps